Sunton ESP32-8048S0xx ~
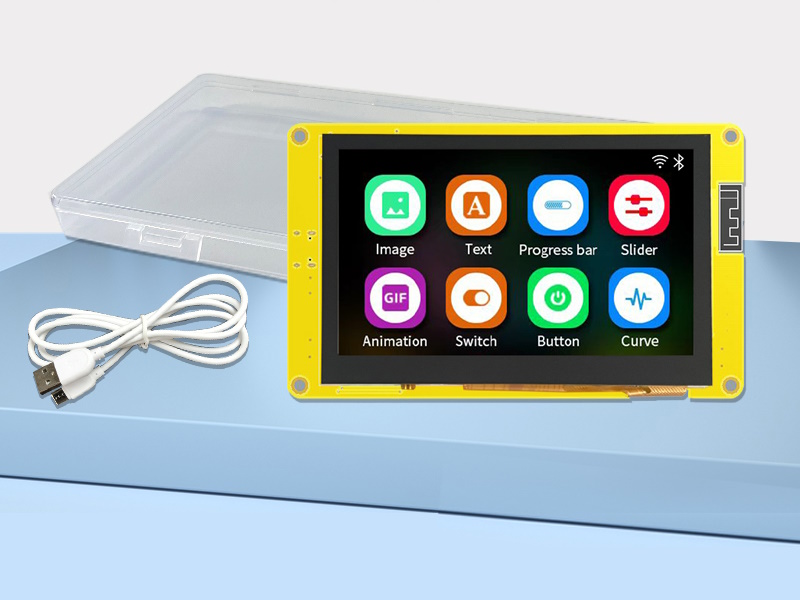
These are great "all-in-one" device that have integrated ESP32-S3 chips with 16 MB of flash and 8MB PSram. There are 3 sizes available with an 800x480 resolution ranging from 4.3", 5" to 7" display and built in capacitive touch panel.
The 4.3" and 5" model have an IPS panel so the viewing angles are great. The 7" version uses a TN panel with acceptable viewing angles but a larger display area.
Models~
| Model | 4.3" IPS Capacitive | 5.0" IPS Capacitive | 7.0" TN Capacitive |
|---|---|---|---|
| SKU | ESP32-8048S043C | ESP32-8048S050C | ESP32-8048S070C |
| MCU | ESP32-S3-Wroom | ESP32-S3-Wroom | ESP32-S3-Wroom |
| Flash | 16 MB | 16 MB | 16 MB |
| PSram | 8 MB | 8 MB | 8 MB |
| Display Panel | 4.3" IPS | 5.0" IPS | 7.0" TN |
| Resolution | 800x480 | 800x480 | 800x480 |
| Touch Screen | Capacitive | Capacitive | Capacitive |
| SD Card |  yes yes |
yes |
yes |
| Screen dimming | yes |
yes |
yes |
| Buy | Buy | Buy |
The audio port and SD card are not supported by openHASP 0.7.0-rc11.
Note
Models can have Resistive (r) or Capacitive (c) touch screens, you need to ensure you purchase the correct version and load the corresponding firmware for the device you have.
ESP32-S3 Modules have PSram and are more suitable for loading fonts, and graphics.
Features~
The Sunton screens are fully featured and ready to use screens with ESP32(S3) integrated, touch control integrated (Resistive or Capacitive), with resultions as high has 800x480! (in the 4.3"+ screens). The back has many GPIO pins avialable through an included connector, TF Slot, Audio out (some versions), note: audio/tf not supported in openHASP yet.
Cases~
If you have a 3D printer, cases are becoming available:
SUNON ESP32-2432S028 DISPLAY BOX: https://cults3d.com/en/3d-model/gadget/esp32-2432s028-display-box
SUNON ESP32-3248S035 DISPLAY BOX: https://cults3d.com/en/3d-model/gadget/sunon-esp32-3248s035-matsekberg
SUNON ESP32-8048S050 DISPLAY BOX: https://cults3d.com/en/3d-model/gadget/sunon-esp32-8048s050-display-box
Other cases maybe available, search printables, thingiverse, etc
Flashing~
Compile your own via platform.io and platformio_override.ini environment templates.
Also available via web installer at https://nightly.openhasp.com/
or the latest found under Github Actions, click on the latest action, and look under the Assets sections for zip files containing builds binary files.
Recommended method~
-
Use the
Nightlybuild website to initially flash the device. -
Then update with the OTA file found under
Actions,Assetson github. Or compile your own if comfortable doing that.
Initial Setup Notes~
Note that some of the screens have TWO versions, Resistive and Capacitive, so flash the correct firmware (ends in r or a c respectively).
RESISTIVE: After first boot, Run a Calibration via the web ui -> Display Setup -> Calibrate
Then on the screen, touch the indicated points.